folks now that we now have a website with all of the
interviews archived:
http://www.imagedeconstructed.com/
Thanks to Sam Saccone who designed the website, and
without his volunteer work, this would not have been possible.
Now onto this week's interview with Johnny Andrews.
TID:
Johnny, thanks for taking the time to speak with us. This is quite a
compelling image and fashion shoot, and I'm grateful you're taking
the time to talk about this image, and the ones that accompany it.
JOHNNY:
I really admire what you've created with The Image, Deconstructed and am truly honored that you picked a series of my photographs to profile.
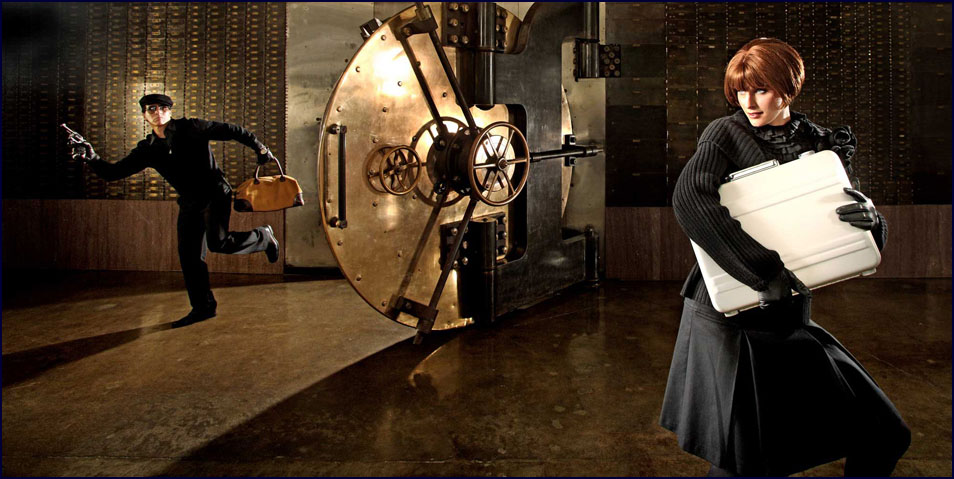
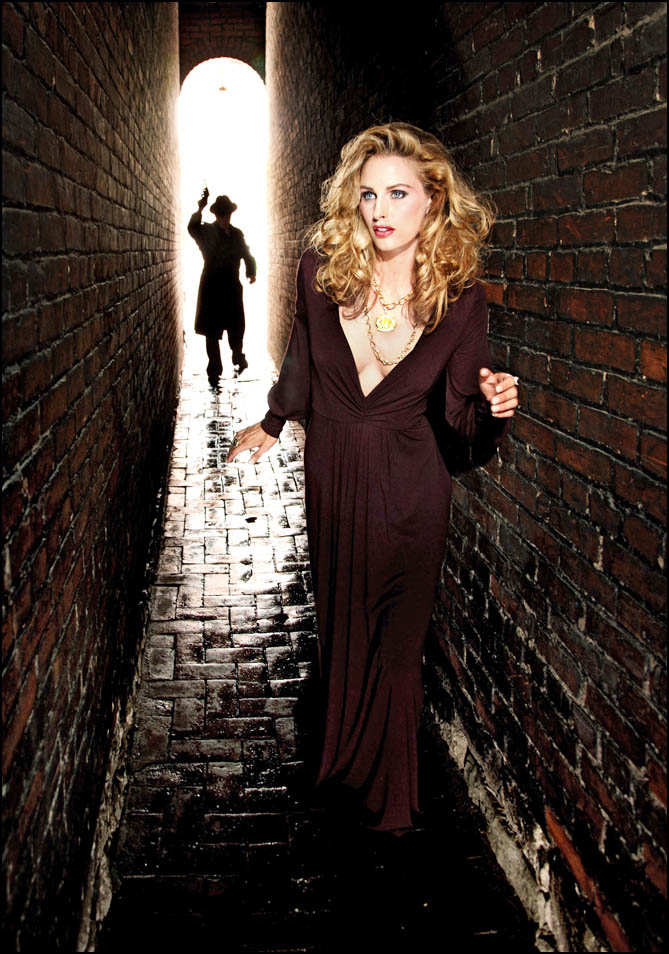
This photograph represents the first image of a fashion series published
in a special section that our newspaper used to produce called LUXE. The
section itself was printed on nice glossy paper, as opposed to regular
newsprint, with all of the main images running in color as either a double
truck or for the full length of the broadsheet.
TID:
Can you tell us about the origin of the piece (how it was pitched),
and how long you worked on it?
JOHNNY:
Each year, a staff photographer was selected to work on the concept, planning,
logistics, securing props, lighting, location scouting and just about everything
else outside of the actual selection of models and clothing for the entire LUXE
fashion shoot. Needless to say, I was pretty happy they selected me. The entire
planning process lasted about a couple of weeks, in between daily assignments
of course.
Several concepts were tossed around in meetings between myself and editors
from our Features department before we finally settled on a film noir-like
theme. Since the photos would be bundled together in the same section, I
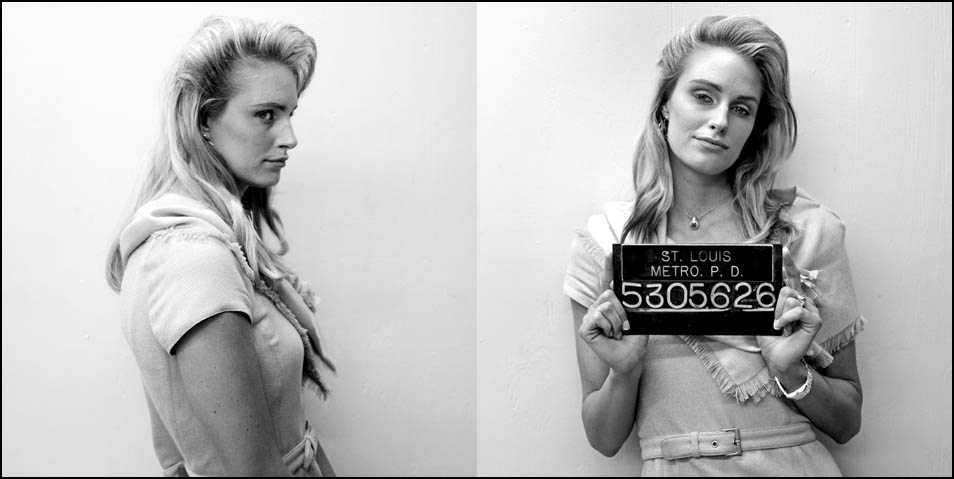
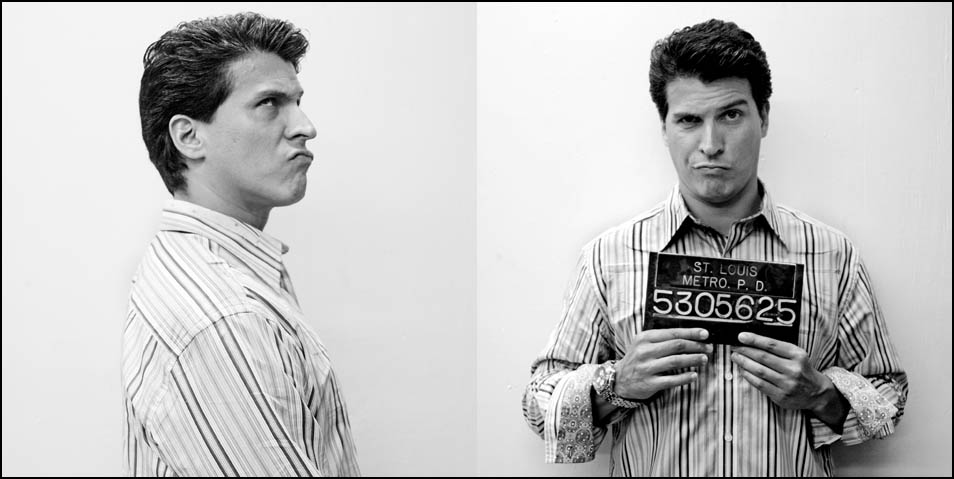
felt as though a storyline was needed, and thus "The Heist" was formulated.
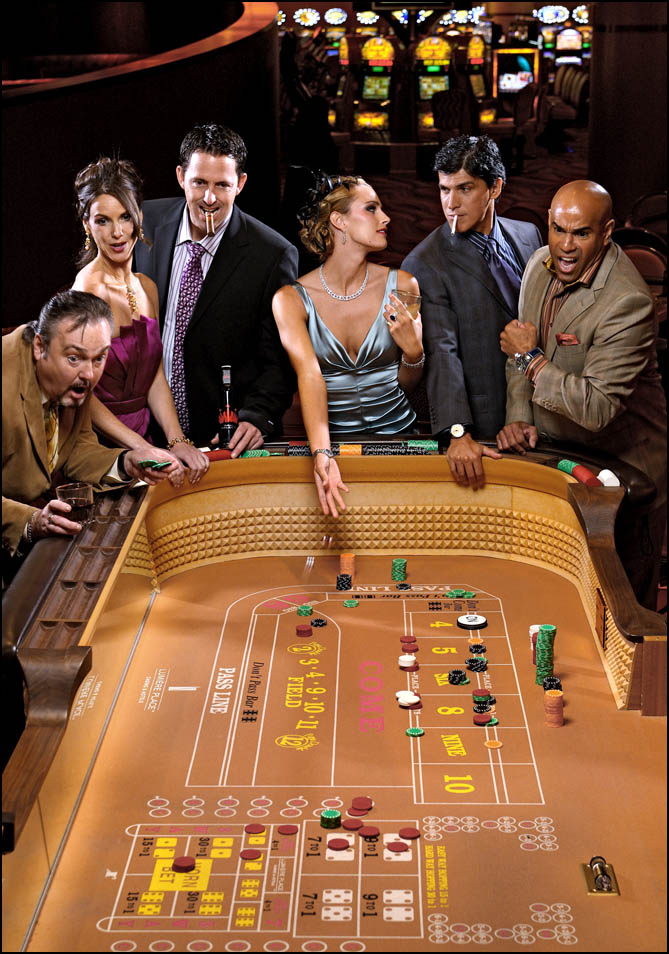
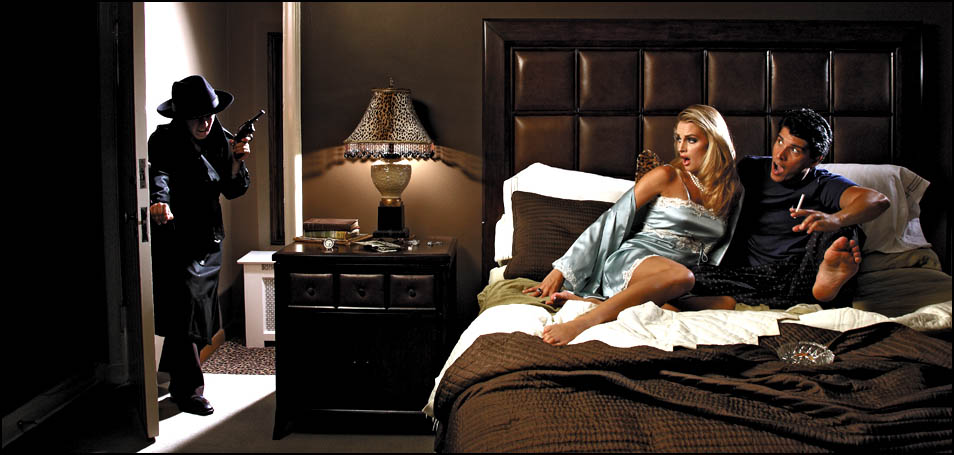
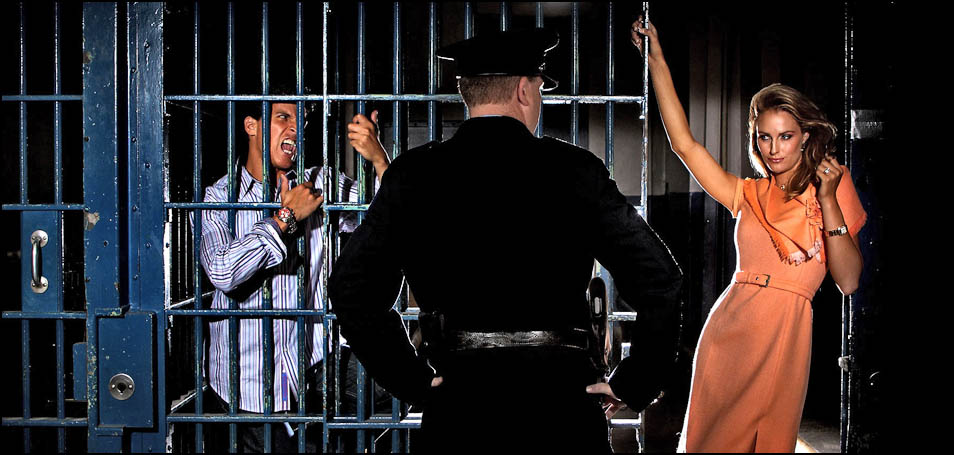
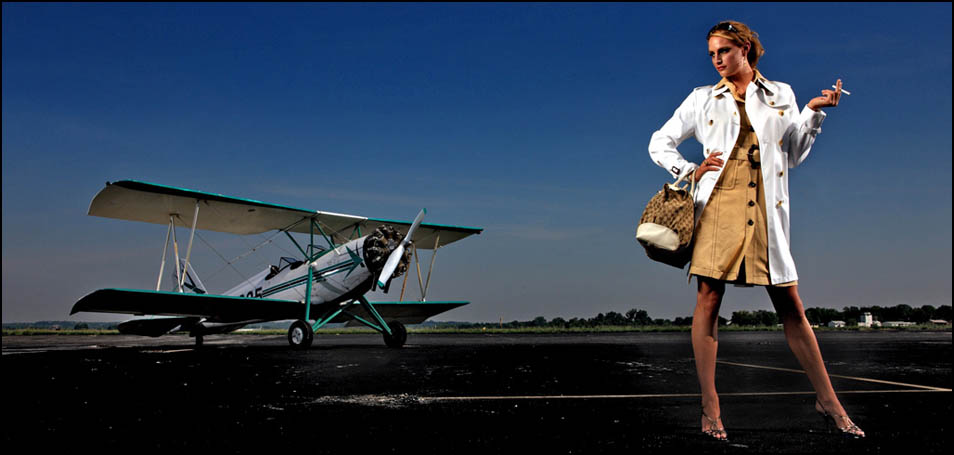
In a nutshell, the premise of our photo shoot was that a handsome yet
conniving couple rob a bank, flaunt and spend the money all around town
while constantly on the run from a detective, and then get caught and thrown
in jail. The finale is when the lady betrays her boyfriend to escape jail time.
A key component of pulling off something like this was the input received
from so many people involved, including Fashion Editor Debra Bass, Features
Picture Editor Lynden Steele and Design Director Tippi Thole as well as staff
photographer Chris Lee who doubled as model stand-in and lighting guru.
The entire photo shoot lasted about five days, with two images from
two different locations made each day, except for the last day which involved
studio photography for detail pics. For each of the eight locations, we had
multiple wardrobe changes, hair and makeup for the models, and of course
we're breaking down and setting up all of our lighting equipment each time
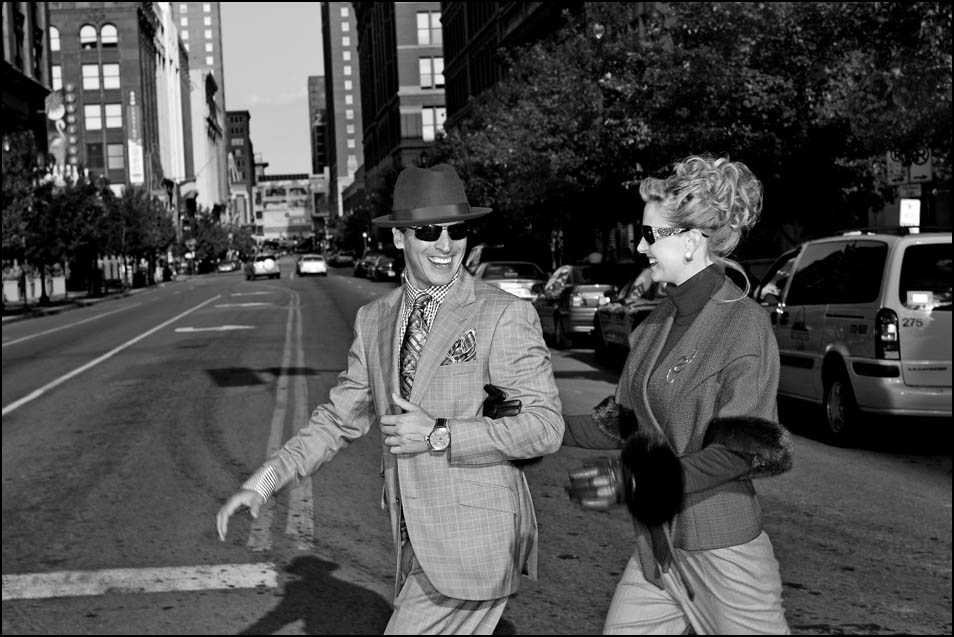
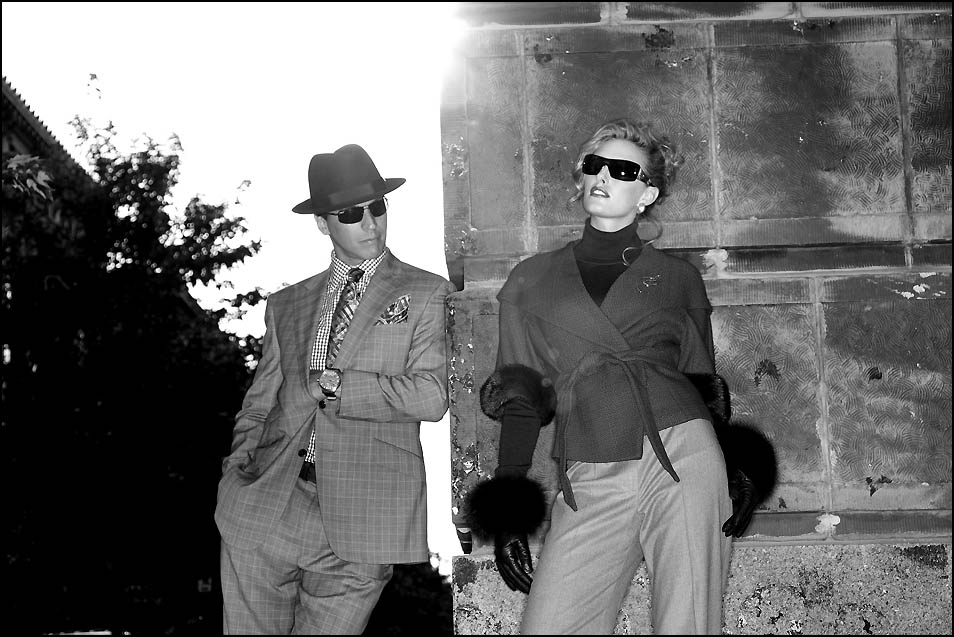
while trying to stay on schedule. In between each of the main images created,
there were also what I like to call "mini photo shoots," where we took the
models to areas near our current location and took impromptu, on-the-street
pics. These would be published in black-and-white as surveillance photos taken
by the detective in our story.
In the end, eight main photos and about a dozen other supplementary images
were created for the section over the course of a week.
TID:
Please tell us about your mental approach to making the main image,
and the entire series.
JOHNNY:
Even though so many facets of the photo shoot were set in stone, from the
predetermined, thin horizontal or vertical shape to where the models would
look based upon layout considerations, I liked the fact that there was still
room for creativity and visual diversity within that framework. And I liked the
fact that there was still a storyline holding it all together.
This allowed me to focus on two things that, at the time, I had very little
experience with: directing multiple models at one time and crafting my light
to look more natural than over-blown. I know those both sound like technical
details, but I've learned over time that it needs to be more of a mental approach.
Whether the model is a pro and arrives on set with the best attitude, poses
and facial expressions or an amateur who doesn't yet understand the shapes
that her body creates with every movement, they all need direction from the
person behind the camera. For so many years, I've been the observant
photojournalist. I knew how to blend in and make myself somewhat invisible
and unobtrusive while trying to capture fleeting moments. Now I was learning
how to set the right mood with a dozen people on the same set and craft an
overall environment in which a moment would hopefully occur. I guess this
isn't too different from shooting a portrait, which we do almost every day as
newspaper photojournalists, except for having a professional poser in the
model, several hair and makeup people, a couple of photo assistants and a
couple of editors watching your every move. In this kind of situation, humor
is a must, at least for me. If everyone is having a good time and getting along,
they tend to have more faith in you and your vision. You, in turn, can hopefully
parlay that into a successful image.
In terms of lighting as a mental approach, I can't help but think of a post
I read on the Strobist blog awhile back about the "lighting journey" of
photographers who have chosen to wander down a path illuminated by
off-camera strobes. That blog post was written in 2006 but I didn't see it
until sometime last year. In it, David Hobby breaks down this journey into
seven steps - available light is best, competent on-camera flash, overdone
off-camera flash, experimentation, the bag of tricks, personal and unique
lighting style, and finally subject-driven light. I won't go into too much detail
because you can check out the blog for yourself but suffice it to say, I could
identify with pretty much every step of that process. At the time of this fashion
shoot, I was overlighting the heck out of everything. I had White Lightning
X1600 strobe units, an octabank softbox, grids, battery packs, etc. and my
philosophy was that I could always use one or two more strobe units no matter
how many I already had plugged in. At this moment, if you were to visualize
Dr. Frankenstein screaming at the sky, "It's aliiiiive!" then that would be me
every time I heard the huge popping sound and recycle confirmation beep
from my strobes.
http://strobist.blogspot.com/2006/11/lighting-journey-where-are-you.html
There's nothing wrong with the aforementioned approach, other than
maybe the whole screaming at the sky thing, but this was essentially
my first foray into lighting high fashion from a softer perspective. This
approach was incredibly influenced by staff photographer Chris Lee, who
was invaluable as an assistant and lighting mentor. Our setups wrapped
light around the models in a more natural way instead of completely
overpowering them. I used to consider this boring light but now I was
able to appreciate it as more genuine.
I still love to break out my huge lights on occasion (cue the grunting sound
of Tim "The Tool Man" Taylor), but I'm much more discerning these days
because of the lessons learned from that fashion shoot and other shoots
since then. It's crucial that every photographer experiment and push their
own boundaries, but, in the words of the amazing photographer Dan
Winters, it's also important to have a reverence for your subject matter.
TID:
Ok, now onto the image itself. Tell us what led up to the image, and what
was going on in the moment.
JOHNNY:
This image set the tone for the rest of the series. It paints the characters
of our fashion shoot as suave, sophisticated, well-dressed criminals. When
we talked in meetings about the robbery scene, the first location that
immediately popped into my head was the bank vault at City Museum,
less than seven blocks away from the newspaper. City Museum is a former
ten-story shoe factory in downtown St. Louis that was turned into an
amazing museum / playground / obstacle course / wonderland / you
name it. One of the hundreds of visual attractions is an actual bank vault
room, complete with safe deposit drawers. Once permission was secured
with the museum, it was just a matter of pre-visualizing the image.
I took scouting pictures of the vault door area and brought them to the
planning meetings where we talked about how a double truck image could
be created. We knew that the page gutter would split the image right down
the middle so we definitely wanted to put one person on either side of the
image, each looking back at each other for visual continuity.
On the day of the shoot, there were only a few details that needed to be
worked out. Due to spacing between the camera and our female model, we
had her crouch down a bit to fit within the frame of the background, but
this worked out well because it just looked like she was creeping away from
the vault. We also spent time directing the male model on the angle of his
arm and legs so that the light hit him correctly and so that he separated
nicely from the background. We also increased the exposure on our strobe
units slightly to compensate for the dark clothing on both models.
Every ten minutes or so, we would pull the card from the camera and pull
up images on the laptop screen to make sure they fit into the pre-determined
shape of the layout.
Thanks to scouting and pre-planning, everything went as well as it could
have on the day of the shoot.
TID:
Were there any points of conflict or struggle during the making of these
pictures, and how did you handle it?
JOHNNY:
One of the best things about a photo shoot that is deemed this important
in terms of time and resource allocation is that you've got more than one
set of eyes on location. I'm behind the camera, I've got an amazing
assistant/staff photographer helping to set up lights, another staff
photographer who was on set as a background model and lighting
assistant for two days of the shoot, the fashion editor is not only
helping coordinate what the models are wearing but how it looks on
them, and the design editor is on location to proof the sizing of each
photo for layout purposes. There are also hair and makeup stylists
and the models themselves peeking over our shoulders when we look
at the images on my laptop while previewing the photos.
While this was great in terms of building a consensus, the more people
you have on the set of a photo shoot, the more potential there is for
conflict when there is a difference of opinion. Sometimes these
differences involved poses or facial expressions and sometimes they
involved our lighting setup or actual location and camera angle. The
most important thing to realize is that it's not personal, which can be
hard to recognize at the moment. I was totally invested in the project
and, at first, felt as though a non-photographer questioning a technical
aspect of the shoot was out of line when in reality it turned out to be a
valid concern. For this reason I think it's also important to at least take
all ideas into consideration, without giving up your overall vision.
TID:
Can you tell us some of the technical aspects of the shoot?
JOHNNY:
In terms of lighting, the photo was built up in layers.
The vault room itself is huge and regularly used by City Museum for
wedding receptions. A long row of loft-style windows line the wall
on the right side of the room and behind me, letting in lots of soft,
reflected light. This actually creates a perfect softbox effect if soft
light is the goal, but we wanted something more dramatic for this
particular shot. To this end, I underexposed the entire scene by
several stops to create a dark foundation layer. From there, assistants
Chris Lee, Emily Rasinski and I built up the scene, one strobe unit at a time.
We put the strobe unit in a large softbox at camera left,
aimed back towards the model. This created a soft shadow line on her
face and lit up half of her body. We then added another strobe unit to
camera right with a gridspot to create a hard edge light and separate
her from the background.
Also at camera right was a strobe on a short light stand with a tight
gridspot on it aimed directly at the vault door to create a reflective
punch of color from the brass. We kept moving that light farther back
while changing the angle and intensity of the exposure so that it
would still create a hot spot without being overwhelming.
Another strobe unit was placed in the vault with only a reflector to
create a bright light that would fill the darkness of the floor and the
backside of our male model. A bonus with this light was that it was
bright enough to also create a nice highlight on the gun.
The final strobe unit was a softbox placed to the left of the model
to light up the opposite side of his body. The nice surprise we got
from this was that the softbox from that strobe unit was at just the
right angle to be reflected in the wall behind him, creating a light
halo that further separated him from the wall.
All of the lights were triggered with Pocket Wizards or the built-in
slave cells on the back of the strobes.
For the outdoor black-and-white photos, we were moving quickly
so we needed a portable, battery-powered strobe unit that would
overpower the bright sun. We ended up having either assistant,
Chris Lee or Emily Rasinski, put on a backpack that had a Vagabond
II battery pack stuffed inside. A White Lightning X1600 or an Alien
Bees Ringflash was then attached to The Vagabond II (which weighs
about eighteen pounds, so they got a workout they didn't expect.)
TID:
What did you learn from this assignment?
JOHNNY:
I think one of the most important things I learned from this assignment
was to be patient and to be open to change if either you or other editors
on the set are not quite feeling what is coming out of your camera.
I tend to fully pre-visualize assignments like these where I'm dealing
with a fully controlled environment, much more so than I do for daily
news or feature work. I even have a notebook where I sketch out posing
scenarios and lighting setups the night before. Even though I anticipated
problems, because of course things don't always go according to the
best laid plans, I couldn't anticipate how I would react in the moment.
There were times when I was so sure that I had already gotten THE picture.
In my own mind, I had nailed it. We all gathered around my laptop to
preview the images moments after I shot them and I was quiet, waiting
for what I hoped were smiling faces and nods of approval. Maybe even
a high-five or two. They never came. Instead there were quizzical looks
and a lot of noises that sounded like "hmmmm" and "what if we try
something different?"
In the moment, you feel kind of hurt and start to question your own vision.
Maybe I don't have the best idea for this photo shoot? Maybe I'm not
directing the models as well as I could? Maybe my whole plan is flawed?
Maybe I should have stayed at Holiday Inn Express last night? But I digress…
All of the above could be true, or maybe some of it. I had to learn to stand
my ground on what I truly believed while taking nuggets of advice from
others on set and implementing it all into a final picture that would put a
smile on just about everyone's face. Easier said than done when you've got
six sets of eyes on a photo and a clock that's ticking. I also had to do it
diplomatically, because no one likes a dictator. Do you know how hard
this is for an only child? I'm just sayin'.
TID:
In conclusion, what advice do you have for photographers while
working on a more complex lighting situation like this (think in terms
of the mental strategy)?
JOHNNY:
The first thing you have to ask yourself is why are you lighting this?
What are you hoping to achieve? Are you aiming to produce something
more dramatic, more natural, more surreal? Before you start unpacking
lights, step back and visualize the entire scene. Where do you want to
locate your light and what is the purpose of each light? Is it going to be
soft or hard light? Will it need to be a narrow beam of light, requiring a
gridspot or do you want that light to illuminate more than just a
particular area of the photo? Are you going for the super, over-the-top,
ESPN the magazine, NFL football superstar lighting or are you trying to
simulate a lighting pattern that would normally be in that environment?
Ultimately, you get to determine the entire mood of the photo based
upon these decisions. No pressure.
There are no wrong answers to any of those questions depending, of
course, on the needs of your client. You should always shoot for
yourself and experiment as much as possible, but you also have to
keep in mind where this picture will be published and find common
ground between what you like and what's needed. It's not too
different from newspaper daily assignments in this respect. Shoot the
safe stuff that they expect to see, then start playing around with angles,
exposure, moments and lighting that push you, and maybe even your
subject, out of the comfort zone. At best, your editor goes with the
experimental images you made while playing around. At worst, you
have a bunch of pics that you wouldn't show your own grandma, but
you still learned something in the process.
Get there really early, if possible, and set up your lights to test and
troubleshoot before the models show up. If you don't have an assistant,
get used to bringing a tripod and use yourself as the stand-in model.
Don't have a tripod? Then try to grab someone nearby - a public relations
person, a secretary, a janitor, anybody. Offer them candy, an emailed
picture of themselves standing in your super hero lighting setup, a trip
to Cancun. Ok, that last one might not be in the client's budget. For a
heavily involved lighting setup with more than one person, the old, "I'll
just hold the camera at arm's length and point it back at myself to see
how the lighting looks" technique might work in a pinch, but you'll be
better off shooting your test pics at the same angle and focal length that
you will use when the actual model shows up.
I could easily say that you shouldn't over think it, but then I would be
lying to you because I over think the heck out of situations like this.
That's just how my mind works but each photographer has to find their
own methodology. I like to pre-visualize various scenarios, from poses
to lighting and then run my ideas by other photographers for more input.
By the time I pick up the camera, I already have a few ideas but then I
hope that in the process something will happen that I didn't expect and
make it even better. Sometimes you hit the jackpot and sometimes you
go home with the losing lottery ticket and a sad trombone sound following
you out the door, but don't let it be for lack of preparation.
And speaking of preparation, studying goes a long way. Study the work
of photographers you admire, the ones you personally know and the ones
whose blogs and websites you find yourself stalking every week. There is
an old photo axiom that goes something like, "It's all been done before,
but not by you." If you do enough research, you'll find that most of the
pictures you want to make have probably been made before, but they
haven't been made by you and creatively stamped with whatever
personal and unique vision that you bring to the picture...yet.
+++++
Johnny Andrews is a photographer based in St. Louis, Missouri. He has spent the last fourteen years making pictures of everything from community festivals and Super Bowls to spot news and high fashion. After realizing that business accounting just wasn't in his future, he switched to photojournalism and film at the University of North Carolina at Chapel Hill and has only looked back on occasion just to remind himself that he definitely made the right choice. He has worked as a staff photographer for The Florida Times-Union, The (Raleigh) News & Observer, The South Florida Sun-Sentinel and is currently on staff at the St. Louis Post-Dispatch.
His work has been recognized by the Atlanta Photojournalism Seminar, the Southern Short Course in News Photography, the Society of Newspaper Design and with a Racial Justice Fellowship through the University of Southern California's Annenberg Institute for Justice and Journalism among others.
You can view more of his work here:
http://www.johnnyandrewsphoto.com/
http://www.johnnyandrewsphoto.com/blog/
+++++
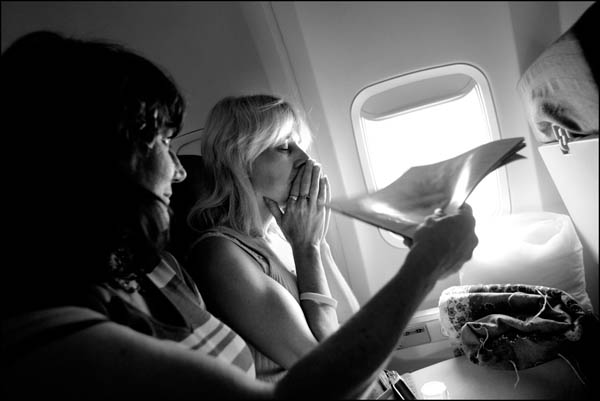
Next week on TID, we'll take a look behind this image from Jason Arthurs,
who will talk about documenting a sensitive subject from one spot, and
what it took to achieve this access:
As always, if you have a suggestion of someone, or an image you
want to know more about, contact Ross Taylor at: ross_taylor@hotmail.com.
For FAQ about the blog see here:
http://www.imagedeconstructed.com/
No comments:
Post a Comment